How To Create a Zip File on Windows 10/Windows 11
To create a zip file in Windows 10, you don’t need to install a third-party file compression tool like 7-Zip or WinRAR. Because Windows Explorer natively supports creating ZIP files.
To create a zip file, right-click the file(s) or folder(s) you want and select Send to > Compressed (zipped) folder.
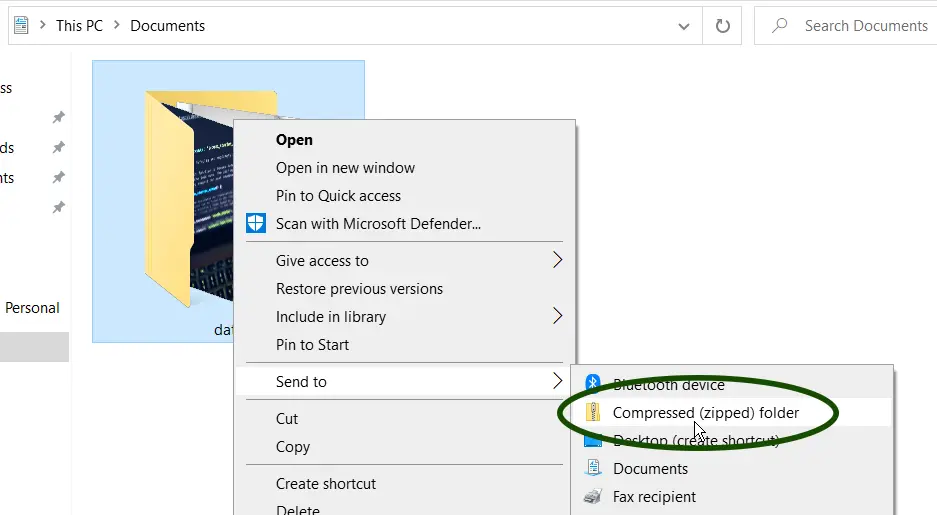
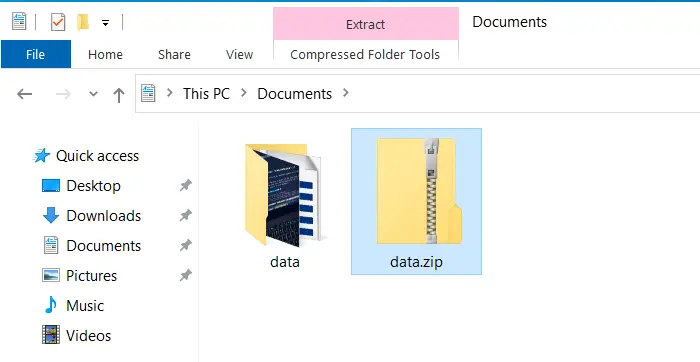
It’s as easy as that. Windows will create a new zip file in the same folder that contains the source file.
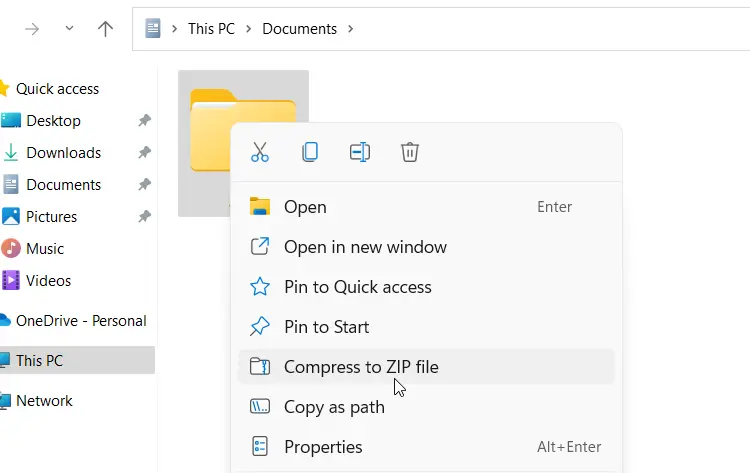
In Windows 11, you will see a menu option called “Compress to Zip file”, when you right-click a file(s) or folder(s).
Using 7-ZIP To Create ZIP Files
But if you’re looking for more advanced features like password protection, you need to install a third-party file compression tool like 7-Zip or WinRAR.
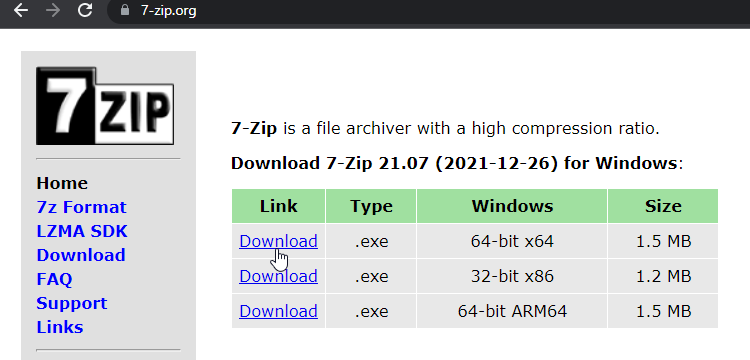
For Windows 10, we recommend 7zip, which is a free and open-source compression tool. You can download 7zip from the following URL: www.7-zip.org.
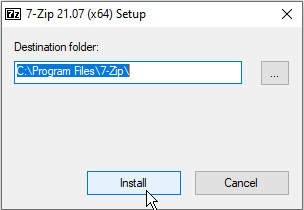
After the download is finished, double-click the setup file and click install.
To create a Zip file, right-click the folder or file you want, and you will see the following options:
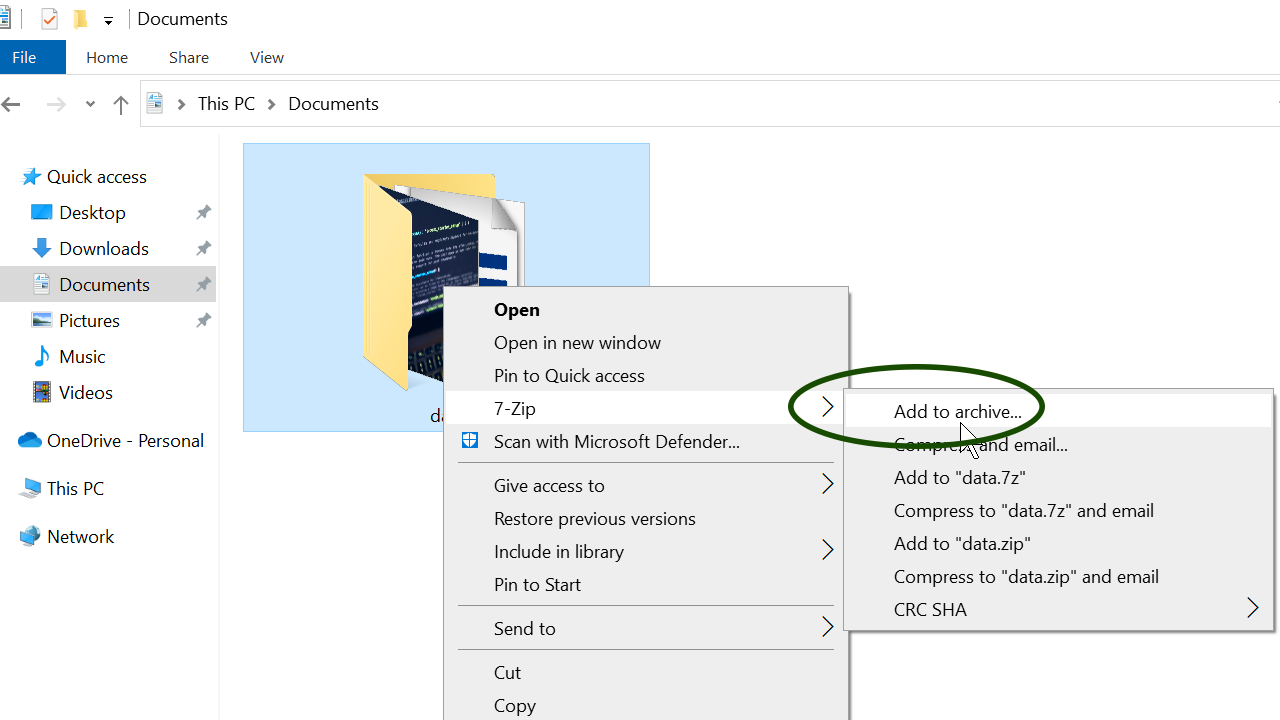
In the contextual menu, navigate to 7-Zip and click Add to archive. The “Add to archive…” window appears where you can select save location, compression method, etc.
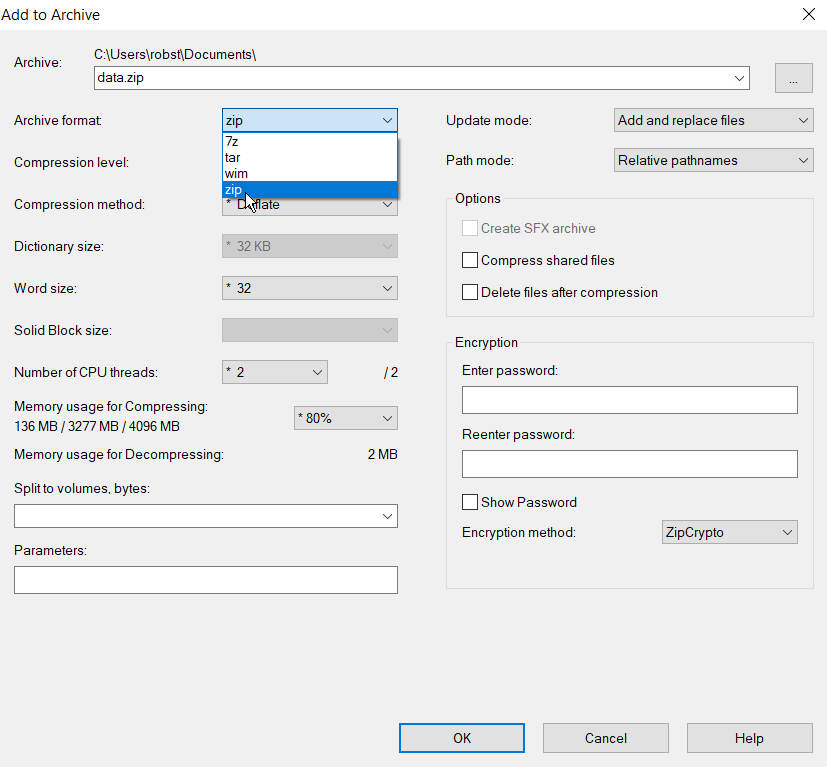
7-Zip has its native archiving format called 7z and supports other archive formats such as ZIP, RAR, CAB, and more. It can even uncompress Linux tar and gzip formats.