How to Install Apache on CentOS 7
In this Tutorial I will guide you through the installation of Apache HTTPD Server on Newly released Centos7 Operating System. In Addition we will also configure the CentOS firewall to allow HTTP request. Then we will do the PHP, MySQL and phpMyAdmin Installation too. At the end of this tutorial you will learn how to setup Complete CentOS 7 LAMP Stack.
Install Apache Server
Installing Apache on CentOS 7 is very easy with yum Command
yum install httpd
Now Start the Apache httpd server using systemctl Command
systemctl start httpd
Also set Apache Server to start on Server Startup with systemctl command
systemctl enable httpd
In CentOS 6.5 and Previous Versions we used chkconfig command to configure a service to start at startup.
Add Firewall Rules
Now Add Following Firewall rules to allow http request
firewall-cmd –permanent –add-service=http
firewall-cmd –reload
Now the Apache Installation is finished, you can type your server IP address on the web browser and you should get the CentOS Apache default Web Page.
- Main Apache Server Configuration file in CentOS 7 is /etc/httpd/conf/httpd.conf file.
- By default Server Document Root has been set to /var/www/html.
- You can Instantly Publish your Website by adding Content to /var/www/html Directory.
Now You Have Learned How to Install Apache On CentOS 7. Lets Continue the Tutorial on PHP and MariaDB Server Configurations.
Install PHP
PHP is the most popular dynamic web scripting language today and it has designed to run with Apache web server. Now lets install the PHP.
yum install php
Install MariaDB (Mysql) Database Server
MariaDB is a Drop in replacement for MySQL, With the Release of the CentOS 7 MariaDB has been the default RDBMS(Relational Database Management System). Simply it is same as MySQL Database and works the same way MySQL do.
Install MariaDB with yum Command
yum install mariadb
systemctl start mariadb
systemctl enable mariadb
Now run the mysql_secure_installation command to setup root password and to secure your database server
mysql_secure_installation
After entering the command you will be asked to setup password to mysql root user.
Install phpMyAdmin
Last but not least, we will also Install the phpMyAdmin on Our CentOS 7 server. phpMyAdmin Provides the graphical user interface to manage MariaDB and MySQL databases.
First, We need to Enable epel repository, Because phpMyAdmin Does not Comes with the default CentOS Software Repository.
yum install epel-release
yum install phpmyadmin
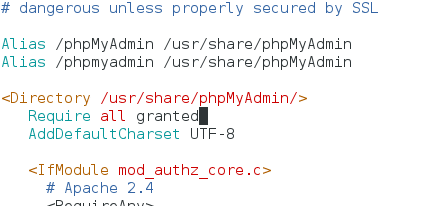
Then we need to fixed some permission issue, Open phpMyAdmin Configuration File in a Text Editor
vim /etc/httpd/conf.d/phpMyAdmin.conf
Add Following Line just after the “<Directory /usr/share/phpMyAdmin/>” tag
Require all granted
Now restart the apache server
systemctl restart httpd
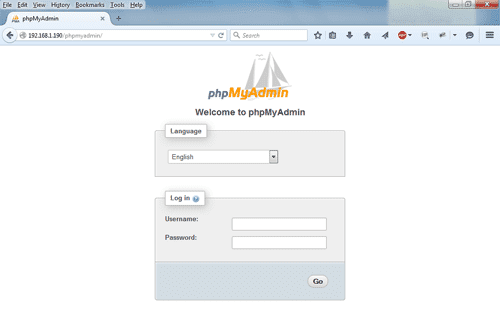
Now you can access the phpMyAdmin from the web browser by typing IPaddress/phpMyAdmin.
After All This step Now You have a Complete Web Server With Lamp Stack On you CentOS Computer. See you again with more Web Hosting Tutorials.


